Just Giving

Etsy Button

Wednesday, 16 February 2011

Hello Kitty!


It was little C's second birthday this weekend and at the moment she is totally obsessed with Hello Kitty. Not sure quite what came over me, but I decided that along with all the rest of the organising I had to do for the birthday party I would make a batch of Hello Kitty fairy cakes. At first I had an idea that I'd just ice them on (thank goodness I didn't go down that route), but then I found a hello kitty cookie cutter online and decided to go the fondant route instead (still rather time consuming, but at least it stood half a chance of actually looking like the kitty herself). In the end, the cakes were fairly easy if rather time consuming. I started by rolling out the fondant icing and cutting out the kitty heads:

Then I did the whiskers with black writing icing and rolled balls of black fondant to make the eyes which I then stuck on with the writing icing. This was a little bit messy and I ended up getting some gum arabic to make up into a paste to stick the rest of the decorations on. The eyes ended up a bit too close together compared to real Kitty so if I were to do these again I'd start with the nose next time I think and work my way from there.


The bows were made by rolling red fondant and then using a pizza wheel to cut thin strips which were then cut to about 1" pieces. I folded the two ends to the middle, squashed them down then pinched in the sides to give a bow shape. After sticking them on with the gum arabic they were left to dry over night. In the morning I made the fairy cakes and iced them with buttercream icing then just stuck the kitty heads straight on to that. I made 24 of them in total - by the time I was half way through I was starting to curse myself for the idea!


As well as the fairy cakes I also made a hello kitty birthday cake:


This was made with butter cream icing, writing icing for the outline and fondant icing with pigment powder for the flowers.

Thursday, 6 January 2011

Snow Fun


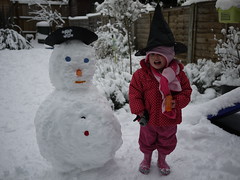
P1010120
Originally uploaded by Cloth cat

Snowman


P1010116
Originally uploaded by Cloth cat
Now sadly missing - all that's left are the buttons and the carrot.

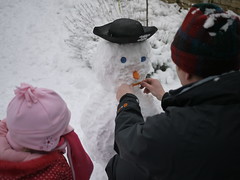
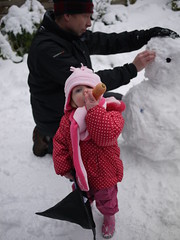
Snow fun


P1010110
Originally uploaded by Cloth cat
You're not supposed to eat the snowmans nose.

Sunday, 31 October 2010

Happy Halloween!


Mwahhhaaah! Happy Halloween to all you spooks out there. Yet again it's been a while since I posted, but at least I have been making something. If I'd had my thinking cap on I'd have taken some photos as I was doing it, but this Halloween mask is really sooo simple to make it I think you can do without them. First take a rectangle of grey felt long enough and wide enough to fit round your eyes (you could measure this, but really you'll get a good enough result by guesstimating). Then take a square of medium weight iron on interfacing the same size as the felt and iron it on to the back. Next iron on some bondaweb onto the front followed by the spiderweb lace (cover with a tea towel when ironing this on). Then you just need to draw your mask shape on to the back of the interfacing and cut out (you may want to practice and make up a paper template first). To get the right positioning for the eyes I put my glasses down on the back of the mask and marked round them. If you don't wear glasses then you could try holding on to your face the wrong way round (interfacing outwards) and marking the points for the outer corners of your eyes that way. It's a good idea to cut one eye first then fold the mask in half and draw round the cut out for the second eye to ensure that they're positioned symmetrically. Now you just need to sew on some elastic (measure it round your head from one side of the mask to the other and remember to make it a little shorter so it isn't loose). Here's how the finished mask looks without spookyvision:


Looking back to my halloween photos from last year shows just what a difference a year makes. Two have grown and one (me) has shrunk. I don't know why I haven't got round to blogging about it, but since March this year I've been doing weight watchers and finally reached my goal weight last Tuesday having lost 2st 11.5 lb - quite a chunk of me really. If you're struggling to visualise just how much that is (and I can never quite get my head round it) it's basically as much as the young skeleton in this years picture - don't think I'd fancy carrying round one of him all day now, but I was!

Wednesday, 27 October 2010

New word


New word
Originally uploaded by Cloth cat
Slowly and surely new words are starting to emerge. Mama, dada and brother have been around for a while now. The latests two are:


knee (as in 'I want to sit on your' or just 'knee, knee, knee' in lottalingo.
no - I think I'm going to be hearing a lot of this last one.

Wednesday, 25 August 2010

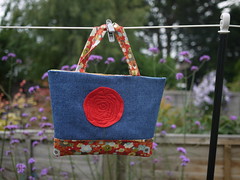
Flower Garden Bag


Flower Garden Bag
Originally uploaded by Cloth cat
Don't seem to get much time for crafting at the moment, but did manage to make a small handbag for one of my friends daughters last month. These a quite an easy make and they're a good way to use up the jelly roll strips I bought a while back and have been wondering what to do with (though could just curse myself for not getting a coordinating fabric from the same range - now discontinued - to use for the lining. Just goes to show you really should bag that fabric while you can even if you don't know what you're going to use it for (ahem).

Quite shocking to see that the last time that I blogged was Easter - not very good going. I've had to switch comments on to moderation now after that last post was deluged with spam comments in chinese (?) script.